Guide for installation: GLS shipping for Woocommerce

Content
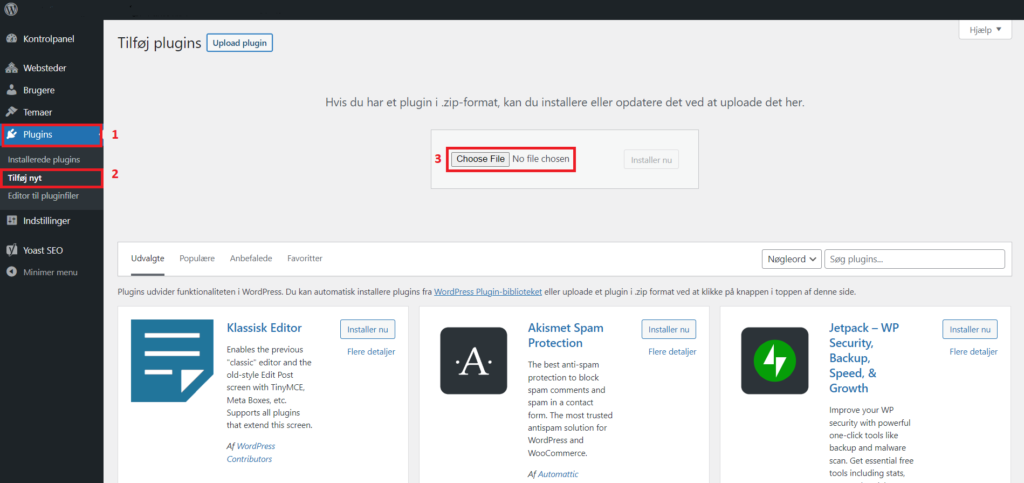
Upload plugin
- Select “Plugins” in the WordPress dashboard
- Click “Add new”
- Click “Browse” and select your plugin file
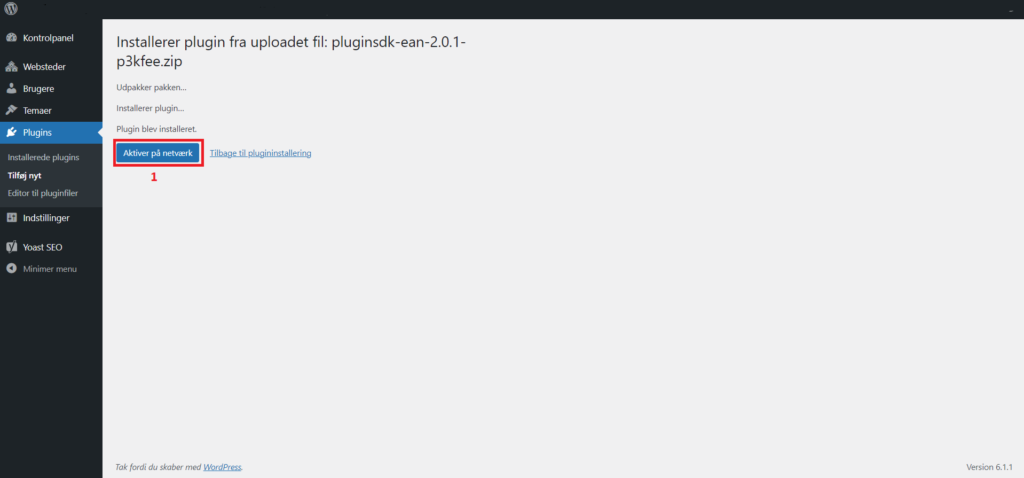
Activate plugin
- Click “Activate plugin” after the upload is complete
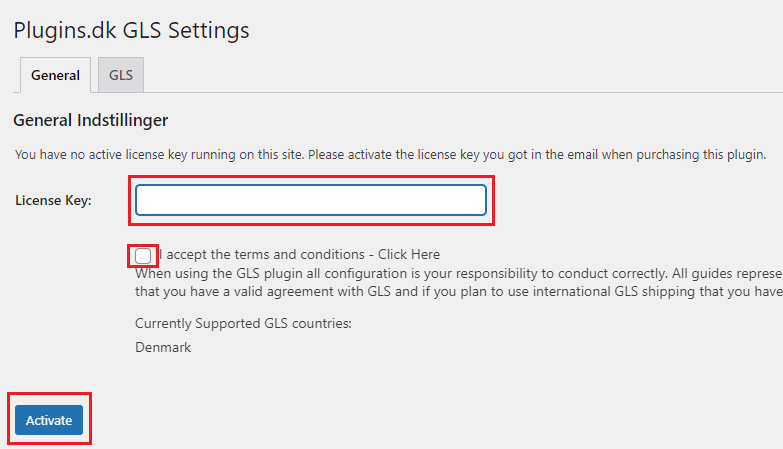
Add license key
- Click “GLS” in the WordPress dashboard
- Paste your license key.
- Accept terms of use
- Click “Activate”
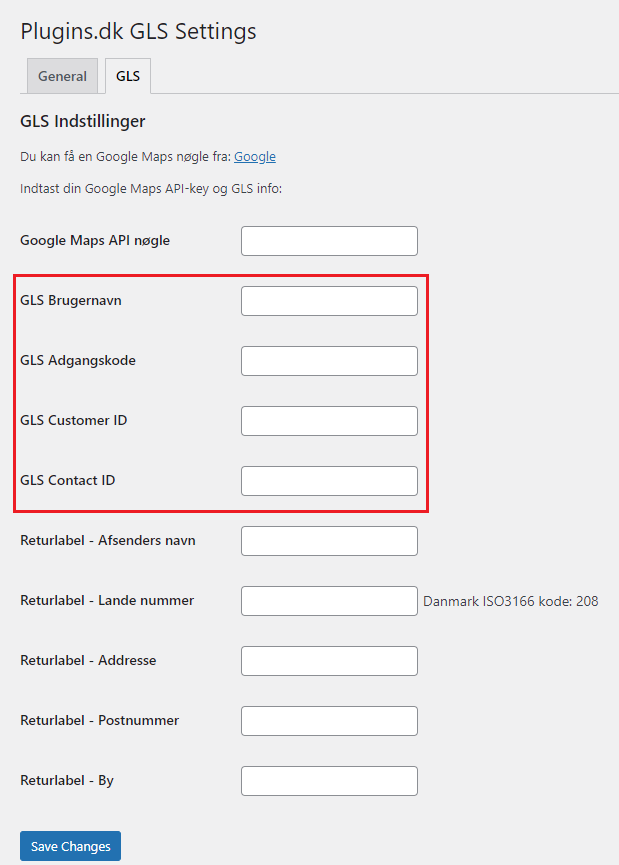
Setup GLS connection
- Click “GLS” in the WordPress dashboard
- Enter GLS customer ID
- Enter GLS username
- Enter GLS password
- Click “Save Changes”
Set up GLS shipping method
- Go to “Setting” in “Woocommerce” in the WordPress dashboard
- Go to the Shipping tab
- Setup or choose shipping zone for delivery If you haven’t set up shipping zone, this is required to do before continuing setting up the GLS method.
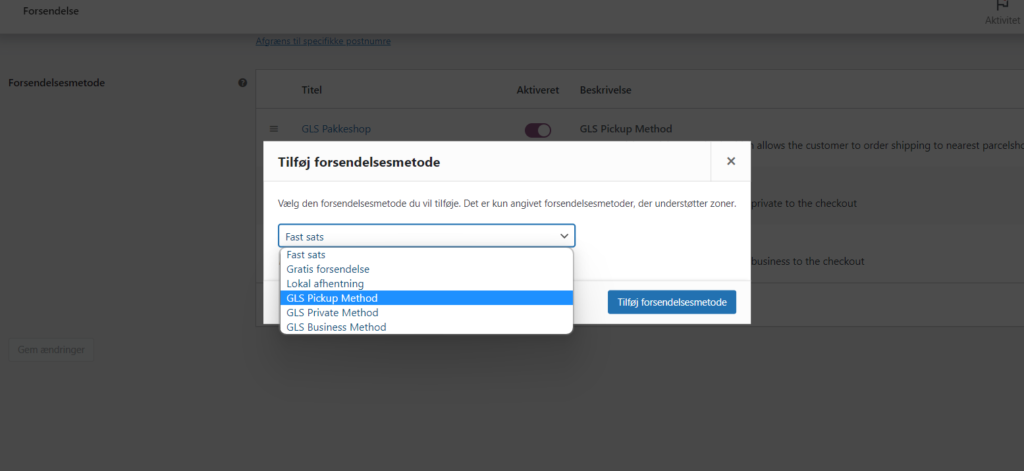
- Click “Add shipping method”
- Choose GLS Pickup Method for PickUp point, GLS Private Method for private address delivery eller GLS Business Method for business delivery.
- Click “Add shipping method”
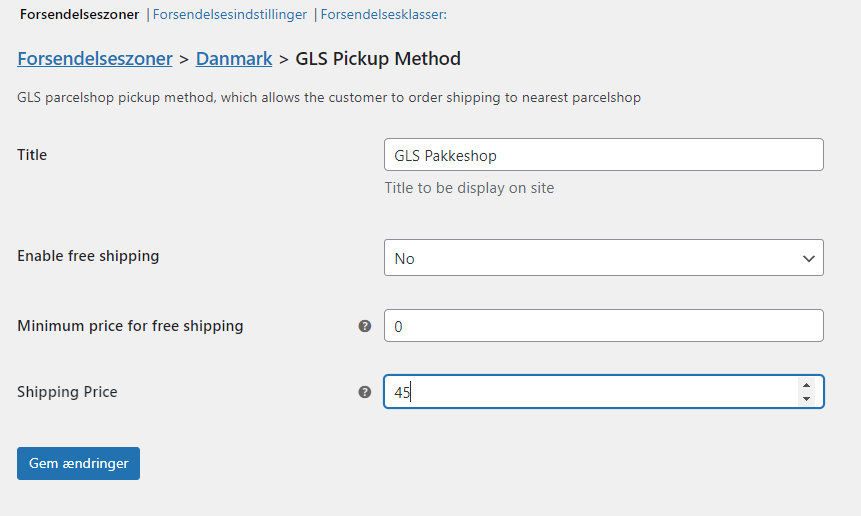
Set up pricing
- Edit the shipping method to set up prices
- Enter your desired price for delivery
- Here you can also edit the titel for the delivery method. This title will display in your webshop.
- Click “Save changes”
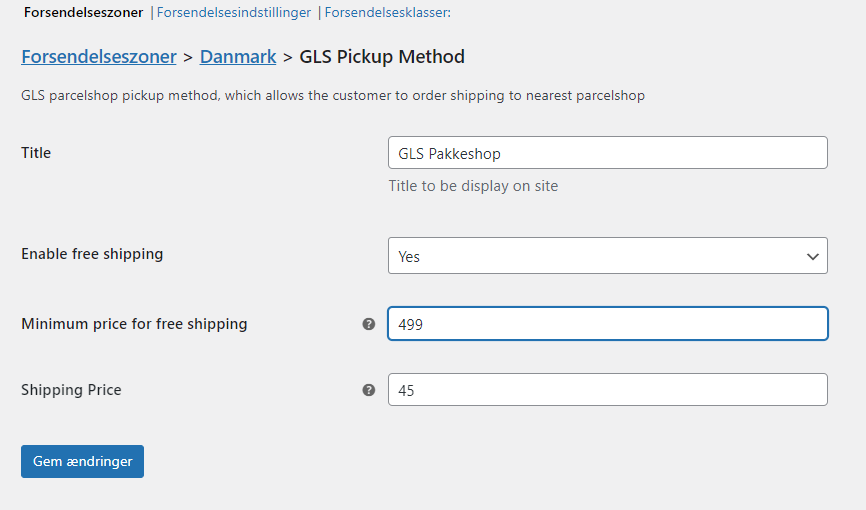
Set up free delivery
- Edit the shipping method to set up free delivery
- Choose “Yes” in the “Enable free shipping” field
- Enter the cart amount reqiured to get free delivery
- Click “Save changes”
GLS shipping for Woocommerce is now set up
Do you need help setting up the plugin please take a closer look at our installations service here.